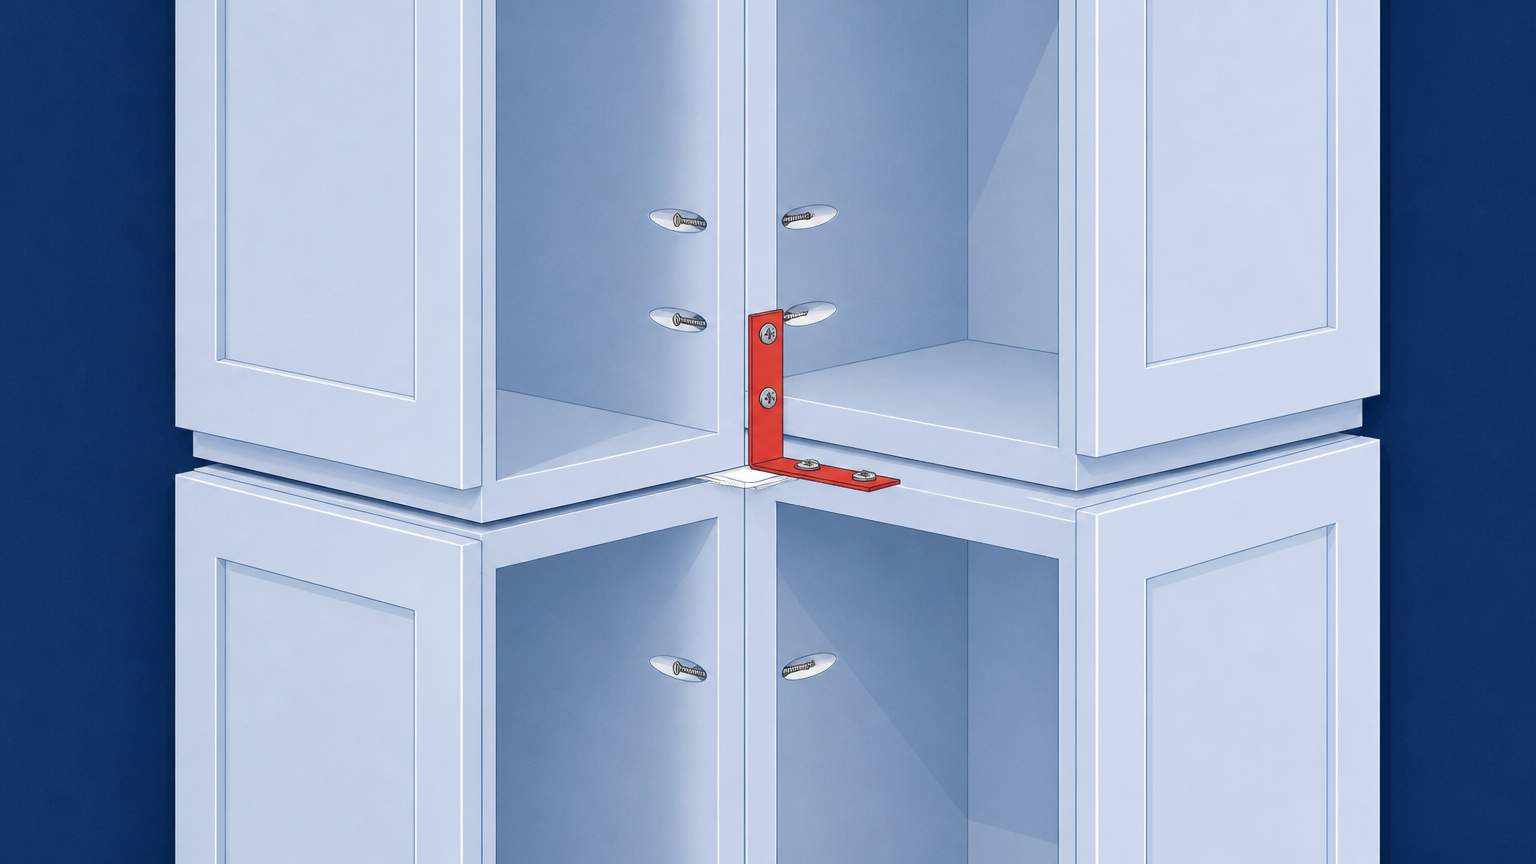
Floridians often need to fasten two rows of wall cabinets together prior to installation. The aim is to keep the cabinets straight and aligned, particularly for storm preparedness, without visible screws on the front that could detract from their appearance. A solid rear fastening system is also important to prevent high humidity from causing warping and finish failure. By using pocket-hole screws, metal L-brackets, a temporary ledger board, and a moisture-resistant construction adhesive, homeowners can create an effective interior-only installation that holds up to Florida's climate.
Start by finding the wall studs with a stud finder and marking the cabinet height. Attach a temporary ledger board at the desired height to the studs. This will provide a level surface to work with while fastening the cabinets. Drill pilot holes through the back panels of the top and bottom cabinets, then drive in pocket-hole screws that connect to the back of the adjoining cabinet. These allow for hidden joint connections, helping keep the cabinets stable and adjustable until they are positioned permanently. Add metal L-brackets to the top and bottom corners to help support the connection; this spreads the load and adds shear strength.
After connecting the cabinets, double-check that they are flush and plumb using a level and straight edge. Clamp the cabinets to the ledger board while securing them to the wall studs with 2-inch cabinet screws, ensuring the screws penetrate at least 1½ inches into solid wood. This final fastening secures them to the framing and locks the joint. Remove the ledger board after tightening the fasteners and check alignment; small gaps can be filled with trim or caulk.
High humidity levels can make particleboard or MDF cabinet backs swell if moisture gets trapped behind them. A thin line of construction adhesive can add stability, but it should be carefully chosen. Use a moisture-resistant adhesive like waterproof contact cement and apply it sparingly to avoid excess that could allow water vapor to flow through. Seal the cabinet backs with an appropriate finish or sealer to balance moisture absorption and prevent swelling.
After curing the adhesive, check the cabinet backs for gaps or unevenness. If the backs are factory-sealed with fused edge banding, the risk of warping is lower, but still seal the areas contacting the wall. This is especially critical near a door trim installation, which may force the cabinet back against the trim, causing distortion. Sealing the back with moisture-resistant adhesive keeps cabinet structures stable, even under humid conditions.
Final assembly should consider how the cabinets will sit next to door trim. Make sure edges are aligned with the trim so as not to force the trim into the back, which could create moisture entry points. If cabinets are positioned above a door, ensure they won't interfere with the door's hinges or pull handles. A small gap can prevent future damage. Attention to these details helps maintain both aesthetics and functionality.
In conclusion, the safest way to join two rows of wall cabinets involves using hidden pocket-hole screws, bolstered with metal L-brackets, sitting on a temporary ledger board, and attached to the studs with 2-inch screws. Use a moisture-resistant construction adhesive sparingly, seal the backs, and align cabinets with door trim for the best results. By following these guidelines, Florida homeowners can achieve a stable, level installation that withstands humidity and seasonal storms. If structural changes to the wall are needed, consult a licensed contractor.
.svg)
.svg)

.svg)
